
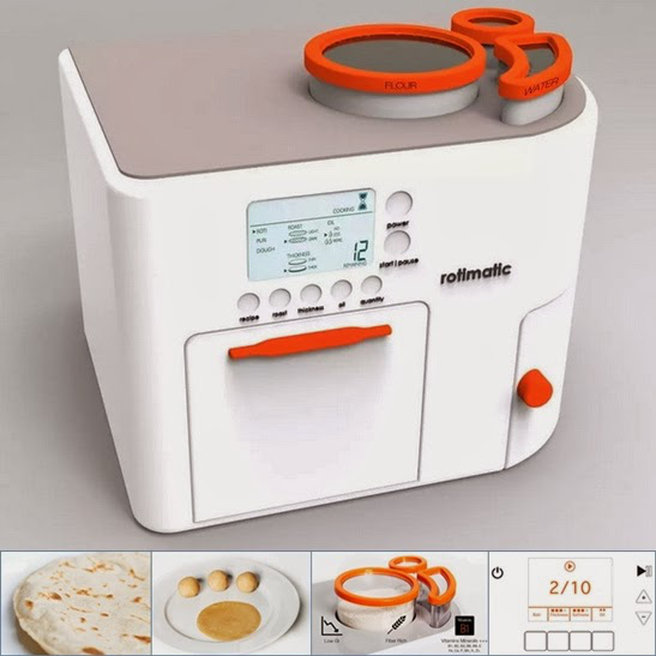
In our busy lives, with jobs no longer sticking to the 9-5 routine, we barely have the time to go to the kitchen and cook food. As a result, we have all developed a tendency of ordering in food daily. Due to this, it will cost a negative consequence on our health. As a solution to our active life, Rotimatic presents you with a roti-maker that will solve your food problems in a jiffy. For the past few years, roti-makers have been quite popular in households as it allows you to have your favourite roti with the side dishes, without you putting in too many efforts.
In case, you don’t know how to make rotis using a roti-maker, this article will provide you with the steps to be followed so that you can make hot and round rotis with the help of Rotimatic roti-maker.
Step 1: Prepare The Roti Dough
This is an essential step. Here, all you have to do is mix the bread flour and salt in a medium-sized mixing bowl. Decide the number of rotis you want to eat or prepare for your family, and then measure the flour and take it. You can use a spoon or a fork to combine or mix both the flour and salt.
In case you do not have bread flour, then you can also use all-purpose flour for the same.
Step2: Adding Butter
The next step is to add some melted butter to the combination or mixture of flour and salt. You need to drizzle the butter over the dough, and then using the spoon or fork; you mix all the ingredients. When the mixture becomes crumbly, you need to stop the mixing.
In case you are not keen on putting butter in the mixture, you can also make use of vegetable oil for the same thing.
Step 3: Pour Some Water
The third step is to add some amount of water to the mixture of flour, salt and butter/vegetable oil. It is imperative to measure the amount of water that Is required to be put in the mix and make sure you don’t add too much water as it will make the mixture too lumpy.
Now, keep the spoon and fork on the side and mix the mixture with your hands. Scrape the sides of the bowl and mix everything to ensure that flour is not left out of the dough. You have to go on mixing the dough, till the time you see that there is no dry flour. It is a bit of a cumbersome and messy work but doesn’t take more than two minutes of your time.
Now, one thing that you need to note before you start mixing with your hand is that you need to wash your hands properly before doing it. There is no chance of you forgetting this, as you don’t want all the germs entering your body and others through the rotis that you make. To make the job a little bit less messy, you can also take off rings on your fingers.
Step 4: Knead The Dough
You need to knead the dough for at least five minutes. Go on pressing the dough, putting it between the palms, etc. You need to rub it so much to avoid air bubbles from coming. This will also distribute the ingredients which will ultimately give you softer and fluffier rotis to enjoy in your dinner.
Once you are done kneading the dough, the next thing that you have to do is to cover the dough with a damp paper towel for the next 30 minutes. Keep a timer for thirty minutes and let the dough rest. Before putting the tower, make sure it’s not dripping with water.
The reason you need to do this is that the moist that comes from the damp towel prevents the dough from getting heard, or even worse, forming crusty areas.
Step 5: Make Small Balls From The Dough
After you have allowed the dough to rest by covering it with a damp towel, it is time to proceed. Sprinkle some dry flour over the mixture, and then take some portion of the dough and make round balls. Depending on the number of rotis you are going to prepare for lunch or dinner, make the dough balls. It is magnificent if the sizes of the ball don’t match with each. However, with practice, you will learn how to make equal balls out of the dough.
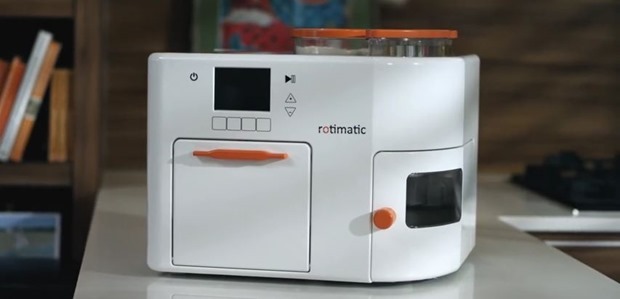
Step 6: Using The Roti-Maker
Turn on the roti-maker and wait to use it till the indicator light shows it is heated up. Once it is heated, place the dough ball in the middle of the roti-maker and keep it closer to the hinge of the machine. Also, you can always work out the best dough placement position through hit and trial method.
After that, close the roti-maker and press the handle to compress the dough ball inside the roti-maker. Set a timer for 35-40 seconds and then open the roti-maker slowly. Then, cook the roti for 10-15 seconds more. Turn the roti after every few seconds so that it is evenly cooked.
Once, the roti starts to puff, put the lid down off the roti-maker gently but do not press the handle. This is the final step in cooking the roti and gives each side one more blast of heat.
Keep an eye on the roti-maker, as the roti will start to puff and it will be time to open the lid once you open the lid, gently with the help of a spoon or a fork. Then take the roti out of the roti-maker and keep it on a plate or a casserole.
Continue making rotis with the rest of the dough balls in the same manner and in no time you will be ready with lots of rotis to be eaten with your sabzi.
Check Rotimatic reviews and Follow these steps and make fluffy and soft rotis that you and your family enjoy without putting too much effort and work in your kitchen.